All Categories
Featured
Table of Contents
- – Rv Sofa Beds Villa Park, CA
- – OCRV Center
- – Rv Interior Remodel Villa Park, CA
- – Awnings For Trailers Villa Park, CA
- – Awnings For Rv Villa Park, CA
- – Replace Rv Flooring Villa Park, CA
- – Replacement Rv Windows Villa Park, CA
- – Rv Replacement Awnings Villa Park, CA
- – Replacement Windows For Campers Villa Park, CA
- – Rv Carpet Installation Villa Park, CA
- – Rv Dining Table Villa Park, CA
- – Awnings For Rv Villa Park, CA
- – Rv Dining Table Villa Park, CA
- – OCRV Center
Rv Sofa Beds Villa Park, CA
Make certain the home window is OPEN so that you can securely understand the window as it befalls of the opening, when the seal is broken. Remove any type of staying sealant using your plastic putty blade, and clean off any kind of staying debris utilizing mineral spirits. Provide the area a last cleansing using massaging alcohol to ensure that the location around the home window opening is cost-free of any kind of oily deposit.

Begin by setting your new home window on a level surface covered with a soft towel, with the outside of the window facing down. Tidy all the method around the edge with scrubing alcohol and a tidy towel. This will certainly guarantee that the surface area is clear of all deposit. Utilizing the included roll of double-sided, closed-cell foam tape, use the tape.
Rv Interior Remodel Villa Park, CA
Eliminate the paper support of the tape just before rounding each corner for a perfect, flat, unbroken seal. When you get to the end, reduced the tape to allow regarding inch of completion of the tape to overlap the factor where you started. When you have actually brought the foam tape around to meet the beginning, overlap completion of the tape concerning 1/2 inch, making certain a great seal.
It might appear odd to damp something you wish to stick, yet it will help you to place the window WITHOUT it staying with the RV sidewall. When the water vaporizes, it will certainly allow the structure of the home window to comply with the outer wall surface of the RV, offering a water-tight seal.

Set the brand-new window into the opening carefully don't push the tape right into place just. When the window is positioned appropriately, push against the window structure from the outdoors, strongly sticking the foam tape to the RV.
Awnings For Trailers Villa Park, CA
See our video clip on top of this message for specific directions on the most effective process for screwing in the new home window framework properly. Rub out any type of excess water, press the 2 drainpipe covers right into location at the end of the frame, and stand out the display right into its track. If your motor home's producer made use of sealer at the top of your home windows as Newmar finished with ours, we suggest replacing that sealer currently making use of the Pro-Flex recreational vehicle Sealer.
Call us at. Improved cleaning/sanitizing of all high-touch locations All staff members wear masks or face shields while interfacing with clients or executing solution on a train Sterilizing consumer instructor access door handles (inside & out) Placing non reusable covers over the steering wheel throughout solution Distancing and sanitization procedure for all consumer and staff member communications Sanitize solution vehicle surfaces twice daily Equip mobile cars with disposable handwear covers, hand sanitizer, and extra cleaning products Increased daily sanitization of work and consumer utilize locations Adherence to the CDC's recommended hygiene methods to stay home if any essential employee or somebody in their family are ill Our teams are utilizing phone, videoconferencing and remote functioning capacities anywhere possible to advertise social distancing Remain well.
Awnings For Rv Villa Park, CA
0 Members and 1 Visitor are watching this subject.
At ParKin Add-on, we are enthusiastic concerning Recreational vehicles and helping our customers locate the excellent components and accessories to enhance their motor home experience. We started as a small family-owned company and have expanded to come to be a trusted provider of quality motor home items for over 40 years.
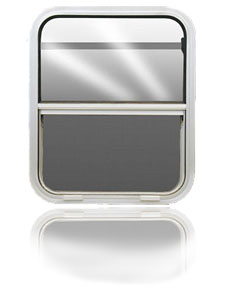
Basic, sleek two transported extrusion frame for installment using typical vehicle h-channel lock rubber gasket. Available in your selection of front-to-rear or rear-to-front sliding glass setup. This home window does not include a display. When you just need to load a hole with an operable window, this is it. Straightforward interior clamp ring installation in an expense reliable version.
Replace Rv Flooring Villa Park, CA
Features our proprietary "Motion Slider Track" supplying smooth operation and the kind of longevity not located in various other home windows. The Series 1600 sets the criterion for a state-of-the-art solitary pane window. Collection 1800 Activity Windows integrate dual pane glassproviding lots of product advantages including remarkable insulation, very little air and wind intrusion, minimized condensation, and noise decrease.
Our production center boasts a fully integrated technique to home window manufacture. The heart of the plant is a special tempering heater. We also have an accuracy waterjet cutting system, a considerable array of glass processing devices, shielded system production, extrusion flexing and developing machines, and the most effective artisans in business.
Our company believe in offering the absolute best worth, quality, and choice. And also, we want you to appreciate your acquisition! In the occasion you desire to send out an item back to us, you may return most unused things for a refund or exchange, minus delivery, within 90 days from the day of purchase unless kept in mind listed below under exemptions and exemptions.
A return authorization will be given, and, in every instance, we'll start to maintain an eye out for your return. For internet orders returned in-store, please take the thing in initial packaging, along with the invoice to any Outdoor camping World retail places for a reimbursement or exchange.
Replacement Rv Windows Villa Park, CA
Reimbursements for internet orders released in-store have the ability to be refunded to a PRESENT CARD or SENT BY MAIL CHECK ONLY; some exclusions may use. For retail purchases returned with an invoice, please return the extra and unopened thing, with the original sales invoice, for a complete reimbursement or exchange. All returns with a gift receipt will certainly receive an installment plan for the amount of the product at the time of purchase.
Appropriate ID will be needed in the type of a legitimate, state-issued vehicle driver's certificate or state ID card. We schedule the right to limit or reject returns without a receipt. Rv Interior Furniture Villa Park. Great Sam Participants that have actually kept a constant active membership status might return any type of extra and unopened item, acquired on Feb
I see no reason some kinds of home windows produced for the home wouldn't function however I additionally don't see any type of benefit to them either. Home home windows are all over the map when it concerns products and quality. I would certainly say all home windows that are mainly plastic or are reviewed together would certainly not be strong enough, wooden core home windows would certainly be also heavy.
Rv Replacement Awnings Villa Park, CA
Frameworks are made with a hard-coat anodized aluminum, which minimizes upkeep and corrosion. Their energy saving building and construction conserves on a/c and heating expenses. Roadway sound is also considerably lowered with our protected home windows. An appealing charcoal grey light weight aluminum display is custom built to fit every moving home window. Our displays slide and are removable for simple cleansing.
We provide the biggest selection of RV home windows at the most effective prices. Lowered Heat Loss Minimized Condensation and Frost Roadway Noise Decrease Anodized Aluminum Frames High High Quality Components, Consisting Of Seals, Tracks, & Equipment Light Weight Aluminum Screen Installed with Vibration Resistance Guides Patented Matching Valve on Oversized Insulated Windows For other.
Replacement Windows For Campers Villa Park, CA
Call us at. Enhanced cleaning/sanitizing of all high-touch locations All employees use masks or face shields while interfacing with clients or doing service on a train Disinfecting customer instructor access door deals with (inside & out) Positioning non reusable covers over the guiding wheel throughout solution Distancing and sanitization protocol for all client and employee interactions Sanitize solution car surfaces two times daily Equip mobile cars with disposable gloves, hand sanitizer, and extra cleaning items Boosted daily sanitization of job and consumer make use of areas Adherence to the CDC's advised health practices to remain home if any type of crucial worker or a person in their home are sick Our groups are making use of phone, videoconferencing and remote working abilities almost everywhere possible to advertise social distancing Remain well.
0 Members and 1 Guest are watching this topic. Rv Interior Furniture Villa Park.
At ParKin Add-on, we are passionate about Recreational vehicles and aiding our clients find the perfect components and devices to enhance their RV experience. We began as a little family-owned company and have expanded to become a relied on company of high quality RV items for over 40 years.
Fundamental, streamlined 2 directed extrusion frame for setup utilizing common automotive h-channel lock rubber gasket. Available in your choice of front-to-rear or rear-to-front sliding glass arrangement. This home window does not consist of a screen. When you just require to fill up an opening with an operable window, this is it. Basic interior clamp ring installation in a price effective version.
Rv Carpet Installation Villa Park, CA
Attributes our proprietary "Motion Slider Track" giving smooth operation and the type of long life not located in other windows. The Series 1600 sets the requirement for a top-of-the-line single pane home window. Series 1800 Activity Windows incorporate double pane glassproviding lots of product benefits consisting of premium insulation, marginal air and wind intrusion, lowered condensation, and noise decrease.
Our production center boasts a fully integrated technique to home window manufacture. The heart of the plant is a special tempering heater. We also have an accuracy waterjet cutting system, a comprehensive selection of glass handling devices, shielded unit production, extrusion bending and developing equipments, and the most effective artisans in the company.
Rv Dining Table Villa Park, CA
Our company believe in offering the extremely best value, top quality, and choice. And also, we want you to appreciate your purchase! In the event you desire to send a product back to us, you might return most unused products for a refund or exchange, minus shipping, within 90 days from the date of acquisition unless noted listed below under exemptions and exemptions.
For web orders, please call our customer care group(1-888-626-7576) to ensure your return or exchange is recorded and any kind of possible inquiries have been answered. In many cases, a return permission will be offered, and, in every situation, we'll start to watch out for your return. For web orders returned in-store, please take the thing in original packaging, along with the invoice to any kind of Camping World retail places for a reimbursement or exchange.
Awnings For Rv Villa Park, CA
Refunds for internet orders provided in-store have the ability to be reimbursed to a GIFT CARD or SENT BY MAIL CHECK ONLY; some exclusions might use. For retail purchases returned with an invoice, please return the unused and unopened thing, with the initial sales receipt, for a complete refund or exchange. All returns with a present receipt will certainly receive an installment plan for the quantity of the product at the time of acquisition.
Appropriate ID will certainly be needed in the kind of a valid, state-issued chauffeur's certificate or state ID card. We schedule the right to limit or reject returns without a receipt. Excellent Sam Members that have preserved a continuous energetic membership status may return any type of extra and unopened item, bought on Feb.
I see no factor why some kinds of windows manufactured for the home would not work however I also do not see any type of advantage to them either. Home home windows are all over the map when it involves products and high quality. I would certainly claim all home windows that are mainly vinyl or are weighed with each other would certainly not be strong enough, wood core windows would be too heavy.
Rv Dining Table Villa Park, CA
Road sound is also considerably reduced with our shielded windows. An attractive charcoal grey aluminum screen is customized developed to fit every moving home window.
OCRV Center
Address: 23281 La Palma Ave Yorba Linda, CA 92887Phone: (714) 909-1444
Email: [email protected]
OCRV Center
We provide the largest option of motor home home windows at the very best costs. Lowered Heat Loss Minimized Condensation and Frost Roadway Sound Reduction Anodized Aluminum Frames Top Quality Elements, Including Seals, Tracks, & Hardware Light Weight Aluminum Screen Mounted with Resonance Resistance Guides Patented Matching Shutoff on Oversized Insulated Windows For various other.
Rv Couch Villa Park, CARv Interior Remodel Villa Park, CA
Rv Couch Villa Park, CA
Rv Dining Table Villa Park, CA
Rv Sofa Beds Villa Park, CA
Replace Rv Flooring Villa Park, CA
Rv Restoration Companies Villa Park, CA
Rv Dinette Table Villa Park, CA
Rv Dinette Booth Villa Park, CA
Rv Upholstery Villa Park, CA
Rv Dinette Booth Villa Park, CA
Remodeling Rv Villa Park, CA
Rv Sofas Villa Park, CA
Rv Microwave Replacement Villa Park, CA
Rv Sofa Sleeper Villa Park, CA
Remodeling Rv Villa Park, CA
Rv Sofa Sleeper Villa Park, CA
Rv Sofa Beds Villa Park, CA
Awnings For Rv Villa Park, CA
Rv Replacement Awnings Villa Park, CA
Rv Replacement Furniture Villa Park, CA
Rv Couch Villa Park, CA
Awning Installation Villa Park, CA
Rv Couch Villa Park, CA
Rv Dining Table Villa Park, CA
Rv Restoration Companies Villa Park, CA
Rv Couch Villa Park, CA
Rv Upholstery Villa Park, CA
Replacement Windows For Campers Villa Park, CA
Rv Refrigerator Replacement Villa Park, CA
Rv Couch Bed Villa Park, CA
Replacement Rv Windows Villa Park, CA
Remodeling Rv Villa Park, CA
Rv Carpet Installation Villa Park, CA
Rv Dinette Booth Villa Park, CA
Rv Interior Remodel Villa Park, CA
Replacement Rv Refrigerator Villa Park, CA
Rv Dinette Booth Villa Park, CA
Rv Interior Furniture Villa Park, CA
Rv Couch Villa Park, CA
Rv Dining Table Villa Park, CA
Replacement Windows For Campers Villa Park, CA
Rv Interior Furniture Villa Park, CA
Rv Floor Replacement Villa Park, CA
Rv Interior Remodel Villa Park, CA
Rv Upholstery Villa Park, CA
Awnings For Trailers Villa Park, CA
Replacement Rv Windows Villa Park, CA
Rv Chairs Villa Park, CA
Rv Dinette Booth Villa Park, CA
Rv Couch Bed Villa Park, CA
Rv Couch Bed Villa Park, CA
Rv Dinette Table Villa Park, CA
Rv Upholstery Villa Park, CA
Rv Replacement Awnings Villa Park, CA
Rv Dinette Booth Villa Park, CA
Rv Dining Table Villa Park, CA
Replacement Rv Windows Villa Park, CA
Rv Couch Villa Park, CA
Awning Installation Villa Park, CA
Rv Restoration Companies Villa Park, CA
Rv Dinette Booth Villa Park, CA
Replacement Rv Windows Villa Park, CA
Remodeling Rv Villa Park, CA
Rv Restoration Companies Villa Park, CA
Rv Replacement Furniture Villa Park, CA
Rv Restoration Companies Villa Park, CA
Awnings For Trailers Villa Park, CA
Rv Restoration Companies Villa Park, CA
Rv Couch Villa Park, CA
Rv Replacement Awnings Villa Park, CA
Rv Carpet Installation Villa Park, CA
Replace Rv Flooring Villa Park, CA
Rv Replacement Awnings Villa Park, CA
Rv Couch Villa Park, CA
Rv Upholstery Villa Park, CA
Rv Microwave Replacement Villa Park, CA
Rv Upholstery Villa Park, CA
Companies Near Me Seo Optimization Services Villa Park, CA
In My Area Seo Company Villa Park, CA
Rv Interior Furniture Villa Park, CA
OCRV Center
Table of Contents
- – Rv Sofa Beds Villa Park, CA
- – OCRV Center
- – Rv Interior Remodel Villa Park, CA
- – Awnings For Trailers Villa Park, CA
- – Awnings For Rv Villa Park, CA
- – Replace Rv Flooring Villa Park, CA
- – Replacement Rv Windows Villa Park, CA
- – Rv Replacement Awnings Villa Park, CA
- – Replacement Windows For Campers Villa Park, CA
- – Rv Carpet Installation Villa Park, CA
- – Rv Dining Table Villa Park, CA
- – Awnings For Rv Villa Park, CA
- – Rv Dining Table Villa Park, CA
- – OCRV Center
Latest Posts
Mercedes Sprinter Repair Near Me Orange
Wheelchair Van Lift Repair Near Me Rowland Heights
Garden Grove Painting Rv Exterior
More
Latest Posts
Mercedes Sprinter Repair Near Me Orange
Wheelchair Van Lift Repair Near Me Rowland Heights
Garden Grove Painting Rv Exterior