All Categories
Featured
Table of Contents
- – Rv Roof Repair Fiberglass Orange, CA
- – OCRV Center
- – Rv Trailer Rubber Roof Repair Orange, CA
- – Replace Rv Roof Orange, CA
- – Rv Roof Repair Service Near Me Orange, CA
- – Rv Rubber Roof Repair Orange, CA
- – Rv Roof Repair Service Near Me Orange, CA
- – Class C Rv Roof Repair Orange, CA
- – Rubber Roofing For Campers Orange, CA
- – Rv Slide Out Roof Repair Orange, CA
- – Rv Roof Repair Orange, CA
- – Replace Rv Roof Orange, CA
- – Roof Repair For Rv Orange, CA
- – Class C Rv Roof Repair Orange, CA
- – Rubber Roof For Camper Orange, CA
- – OCRV Center
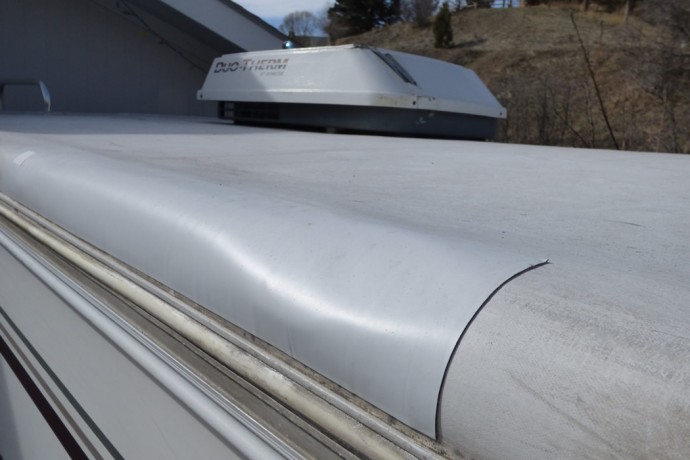
Rv Roof Repair Fiberglass Orange, CA
For fiberglass roofings, initial sanding is suggested to make sure the covering sticks properly.: Treating times differ with temperature and moisture. If the layer begins to skin over in the pail, remove this layer and mix well before proceeding. For application, common paint rollers are suitableapply with a light touch, but do not be reluctant with the amount of coating you roll on.
We wait the high quality of our product with a 100% Life time Guarantee, providing you with total self-confidence in your purchase. That's just how simple it is to repair your RV's roof covering and forget doing roofing system upkeep ever once again. Go on and restore your roofing for the last time now.
Acetone and cloths for a final clean (available at stores like Home Depot or Walmart). Single use paint brushes, rollers, and post extensions (can be found in a Buck Shop). Repaint tray and little bucket Non reusable handwear covers Painter's tape.
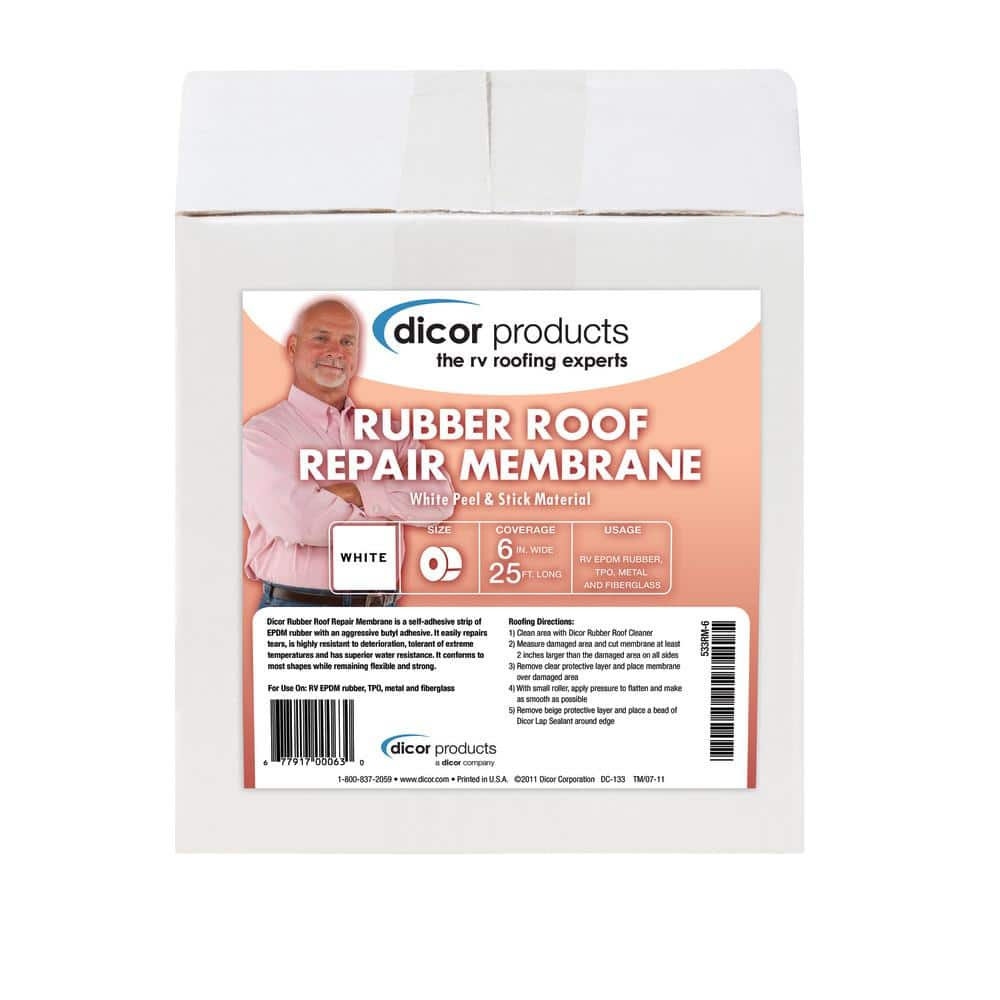
Membrane can be glued either side down. Single-Ply membrane layers coincide shade throughout. Membrane layer has to be installed onto tidy wood surface area, do not mount on top of existing membrane layer, glue, and so on. Router all air vent and accessory openings. Sand all openings, seams, and edges to a smooth finish. Eliminate all debris off roofing with air hose.
Rv Trailer Rubber Roof Repair Orange, CA
"Bed Sheet" the membrane (Rv Slide Out Roof Repair Orange). That is, fold it in half so half of the roof is subjected. 3. Apply glue in a wet film density of 8-10 mils with a short-napped paint roller to the revealed fifty percent of the roof covering decking, brush can be made use of but is a lot more challenging. (1 gal.
- Eliminate all air pockets and creases with a squeegee (gray neoprene head will not streak) or linoleum roller; press firmly functioning from the facility exterior towards the edges, do not be on the roof throughout this moment. All wrinkles should be gotten rid of at this moment for a high quality setup.
Alternate method, standard membrane layer in place using" staples 3"-5" apart then use bar. If roof-edge moldings are not mounted on roof throughout this moment membrane will peel-up as drying out. 8. Apply putty/butyl tape to the behind of the front and back discontinuation moldings/caps. Front cap will certainly lay on top of the membrane layer, membrane must lay on top of the rear cap.
Replace Rv Roof Orange, CA
Both sides of the front and rear roofing system molding have to be secured with caulk/sealant. Making use of an utility blade "x" reduced all roof covering openings.
Diluent Water, if called for. Use as gotten. Clean-up requires only warm water.
Eye contact If product contacts eye, flush with water for at least 15 mins and seek clinical focus immediately. Skin call If item get in touches with skin, clean affected location with soap and water.
Rv Roof Repair Service Near Me Orange, CA
Mask both sides of joint with concealing tape. Cut nozzle to desired grain size. Pierce seal. Lots sealant cartridge in caulking gun. Area nozzle into joint and apply sealer right into space. Apply over 40 deg F (5 deg C)Smooth or "device" grain if required. Eliminate covering up tape quickly. Wipe hands and tools extensively before washing with soap and water.
In instance of eye call flush eyes with water for 15 minutes and call a medical professional. In case of skin contact, thoroughly wash skin with soap and water.
Rv Rubber Roof Repair Orange, CA
My Motor home roofing that requires to be changed! If you're like me and have more time than cash, after that probably your finest option is to purchase an old RV and fix it up.
I get it. I got my Motor home over a year earlier and really did not have the intestines to begin tackling this task up until today. I bought this 1993 Jamboree for $5000.
Rv Roof Repair Service Near Me Orange, CA
Water damages! I've never worked on a Motor home prior to and I have to admit, I'm afraid. Hopefully if you're thinking about doing this yourself, following along on my RV roofing replacement job will certainly give you the nerve to dive in!
I acquired a 12 x 26 SuperMax Canopy by ShelterLogic (over $450 on Amazon however I got mine from North Tool for about $340!) and raised the legs with timber extensions to make the canopy high sufficient that I could depend on the roofing and walk underneath it. That appeared to be my cheapest option.
I figured I prefer to have it semi-portable so I chose the cover, plus this allows me to change the height up and down when I require to. Rv Slide Out Roof Repair Orange. Of training course the cheapest alternative of all would certainly be to just toss a great tarp over the top of your recreational vehicle for rainy days and just work with bright days! Originally I elevated the legs with 1 1/2 PVC pipeline that fit inside the legs and afterwards I connected a tube clamp around the PVC pipe to hold up the canopy legs
Class C Rv Roof Repair Orange, CA
This is still a little drooping. I most likely should have forked out for some stiff steel pipe from the start.
Cracks in the EPDM roof at side of camper. An old spot task on the recreational vehicle rubber roofing. Lots of caulk loaded over old trouble locations. As you can see, this roofing system has actually had a great deal of concerns over the years. Looking from the inside of the camper there have clearly been leakages in numerous locations of the roofing system.
I grabbed an utility blade and started cutting. The first point I saw is that there were two layers. Under is the initial EPDM rubber roofing system layer. I know it's EPDM rubber and not TPO rubber due to the black support. (TPO roof is white on both sides.) On top of my EPDM roof covering is a slim motor home roof coating that was used later on.
Rubber Roofing For Campers Orange, CA
I just left the roofing finishing stayed with the EPDM roof and drew them up with each other. (You do not require to peel them up individually.) Beginning to peel roofing system covering. Peeling off up section of the lower layer of rubber. This reveals that the original motor home roof covering was EPDM since of the black support.
I reduced lines with an energy blade around components. All rubber roof eliminated from camper. This step went quite swiftly. There was a sticky under the bottom layer of rubber that was still rather well embeded many places, however with a good little pressure it peeled off up easily.
Rv Slide Out Roof Repair Orange, CA
Now I can see all the damaged plywood roof decking beneath. I chose to peel off the rubber before eliminating fixtures just so I might see what I was dealing with.
If you assume you'll be conserving the roofing decking plywood (not replacing it), then you could save yourself some cleaning problem by getting rid of the fixtures first and after that peeling up the rubber! Extra water damaged locations on Recreational vehicle roof decking.
I went for the simplest one first, a vent cap from a kitchen sink plumbing vent pipe. There is no various other method around this, you simply have to start excavating until you reveal the screw heads.
Unscrewing the screws in air vent cap. The screws on this air vent cap were hex-head metal screws so I made use of a small socket chauffeur to eliminate them.
Rv Roof Repair Orange, CA
I discovered an old wasp nest inside the air vent cover. This is a sight I'll most likely have actually to obtain made use of to, locating the remains of animal habitation in every nook and cranny. I spend a dreadful whole lot of my time producing excellent wild animals environment in my backyard so I do not get angered when an animal picks to set up home in my motor home.
The good news is nobody was home in this old nest so I simply threw it. Maybe I'll place a screen over it when changing it. Which brings us to the following factor. You ought to try not to harm these pieces (like vent covers and caps) as you're removing the old caulk and sealer just in situation you need to use them again.
My roofing system vent additionally had an air vent cover over it. Starting on the roof covering air vent. Hardware revealed on roof covering air vent cap, the initial nut came off clean.
Replace Rv Roof Orange, CA
The fasteners on this Recreational vehicle roof vent cover were nuts on small screws. The second one simply started spinning, implying the screw was not taken care of in place but transforming along with the nut. A peek at the hardware holding down the roofing system vent cover.
I didn't have any kind of great way to hold the bolt in location so instead I chose to saw through the screws with a reciprocating saw. Sawing with screws on roof covering vent cover - Rv Slide Out Roof Repair Orange. I utilized a cordless reciprocating saw with a metal-cutting blade but it was complicated to obtain the blade level adequate to reach the bolts so near the roof covering deck
Flexing the blade a little bit to reach near the roof deck. When I had actually sawn via the staying three screws, I pried up the cover. The braces that were holding the cover in location. Cover removed from roof covering air vent. I loosened the brackets from the flange of the vent follower itself.
I scratched more caulk and roof sealer off the flange of the roofing system vent itself. I quickly found there were no more screws or hardware holding it down so I offered up on the scuffing and went inside the RV After scuffing the caulk and sealer from flange of roof air vent, no even more screws!
Roof Repair For Rv Orange, CA
A couple sheared off with a great deal of pressure, but two would not move. I had to pierce out the screw heads. I chose a drill little bit near the dimension of the shaft of the screws that I had actually already taken out and started drilling. Choosing a drill bit for piercing out a screw head.
Security glasses suggested. I pierced out the heads, one stood out off and the various other I was getting upset with and offered it a yank prior to it was pierced via. Instead of popping off the screw head, the plastic simply dissolved around the hot screw head. Whoops. Hope I do not have to recycle this cover.
Lifting off the old roof vent. There are two cables running to the roof covering air vent (a black hot cable and a white neutral cable) that you'll need to clip to remove the old air vent.
Class C Rv Roof Repair Orange, CA
These are the cords attaching the roofing airing vent fan. I clipped them simply above heaven splice joints. Roofing vent removed and tidied up. After clipping the cable and getting rid of the vent, I tidied up any continuing to be goop and obtained my first good consider the roofing frame. It's metal! 1 1/2 inches thick.
Some RV roofing systems are framed with wood, others have steel framework. I had no idea what was in my camper till this factor. Not also satisfied about the quantity of corrosion on it, but hopefully it is still structurally appear! I removed some corrosion and made a big mess inside the washroom.
Oops. Perhaps I must have put a tarp down initially. My final goal of the day was to get the fridge vent cover off. I noticed RV sealant blobs at 4 points on the cover so presumed there have to be screws under them. I tore them up and found Phillips screw heads.
Rubber Roof For Camper Orange, CA
Exposing the screws in the fridge vent cap. Removing old recreational vehicle roofing system finish on top of refrigerator air vent cap I also discovered that there was a coat of motor home roofing coating over the vent cap. These finishings are painted on with a brush so plainly whoever did this finishing just blobbed know top of whatever.
Rv Rubber Roof Maintenance Orange, CARubber Roof Installation Orange, CA
Rubber Roof For Rv Orange, CA
Motorhome Roof Replacement Orange, CA
Rv Roof Repair Service Near Me Orange, CA
Resealing Rv Roof Orange, CA
Class C Rv Roof Repair Orange, CA
Rv Rubber Roof Maintenance Orange, CA
Rv Fiberglass Roof Repair Orange, CA
Rv Roof Repair Near Me Orange, CA
Class C Rv Roof Repair Orange, CA
Rv Roof Leak Repair Near Me Orange, CA
Rv Roof Leak Repair Near Me Orange, CA
Rv Rubber Roof Replacement Orange, CA
Rv Roof Repair Orange, CA
Replace Rv Roof Orange, CA
Rv Fiberglass Roof Repair Orange, CA
Rv Rubber Roof Replacement Orange, CA
Replace Rv Roof Orange, CA
Replace Rv Roof Orange, CA
Rv Rubber Roof Replacement Cost Orange, CA
Repair Rv Roof Leak Orange, CA
Rv Roof Maintenance Orange, CA
Roof Repair For Rv Orange, CA
Best Rv Roof Repair Orange, CA
Rubber Roof For Camper Orange, CA
Rv Rubber Roof Replacement Orange, CA
Class C Rv Roof Repair Orange, CA
Rv Rubber Roof Maintenance Orange, CA
Rv Rubber Roof Replacement Orange, CA
Rubber Roofing For Rv Orange, CA
Best Rv Roof Repair Orange, CA
Rv Trailer Rubber Roof Repair Orange, CA
Rubber Roofing For Campers Orange, CA
Rubber Roof For Camper Orange, CA
Resealing Rv Roof Orange, CA
Rv Roof Repair Fiberglass Orange, CA
Replace Rv Roof Orange, CA
Rubber Roofing For Rv Orange, CA
Rv Rubber Roof Replacement Orange, CA
Rv Rubber Roof Replacement Cost Orange, CA
Rv Trailer Roof Repair Orange, CA
Rv Rubber Roof Replacement Orange, CA
Rv Fiberglass Roof Repair Orange, CA
Rv Trailer Rubber Roof Repair Orange, CA
Rv Slide Out Roof Repair Orange, CA
Rv Fiberglass Roof Repair Orange, CA
Rv Roof Repair Near Me Orange, CA
Rv Trailer Rubber Roof Repair Orange, CA
Rv Rubber Roof Replacement Cost Orange, CA
Rubber Roofing For Rv Orange, CA
Rv Trailer Rubber Roof Repair Orange, CA
Rubber Roof For Camper Orange, CA
Repair Rv Roof Orange, CA
Rv Trailer Rubber Roof Repair Orange, CA
Rv Roof Leak Repair Orange, CA
Rv Roof Leak Repair Near Me Orange, CA
Rv Rubber Roof Replacement Orange, CA
Rubber Roofing For Campers Orange, CA
Rv Rubber Roof Replacement Cost Orange, CA
Rv Roof Repair Fiberglass Orange, CA
Repair Rv Roof Leak Orange, CA
Rv Trailer Rubber Roof Repair Orange, CA
Rv Slide Out Roof Repair Orange, CA
Rv Roof Repair Near Me Orange, CA
Rv Slide Out Roof Repair Orange, CA
Rv Trailer Rubber Roof Repair Orange, CA
Rv Roof Repair Orange, CA
Rv Roof Repair Service Near Me Orange, CA
Motorhome Roof Replacement Orange, CA
Rv Fiberglass Roof Repair Orange, CA
Rv Roof Replacement Orange, CA
Rv Roof Maintenance Orange, CA
Motorhome Roof Replacement Orange, CA
Rv Roof Leak Repair Near Me Orange, CA
Roof Repair For Rv Orange, CA
Rubber Roof Installation Orange, CA
Resealing Rv Roof Orange, CA
Local Seo Package Orange, CA
Finding A Seo Services Orange, CA
OCRV Center
Table of Contents
- – Rv Roof Repair Fiberglass Orange, CA
- – OCRV Center
- – Rv Trailer Rubber Roof Repair Orange, CA
- – Replace Rv Roof Orange, CA
- – Rv Roof Repair Service Near Me Orange, CA
- – Rv Rubber Roof Repair Orange, CA
- – Rv Roof Repair Service Near Me Orange, CA
- – Class C Rv Roof Repair Orange, CA
- – Rubber Roofing For Campers Orange, CA
- – Rv Slide Out Roof Repair Orange, CA
- – Rv Roof Repair Orange, CA
- – Replace Rv Roof Orange, CA
- – Roof Repair For Rv Orange, CA
- – Class C Rv Roof Repair Orange, CA
- – Rubber Roof For Camper Orange, CA
- – OCRV Center
Latest Posts
Employee Benefits Consulting Firms Aliso Viejo
Villa Park Employee Benefits Solutions
Burbank Kitchen Hood Repair Service
More
Latest Posts
Employee Benefits Consulting Firms Aliso Viejo
Villa Park Employee Benefits Solutions
Burbank Kitchen Hood Repair Service