All Categories
Featured
Table of Contents
- – Rv Rubber Roof Repair Placentia, CA
- – OCRV Center
- – Rubber Roofing For Rv Placentia, CA
- – Rv Roof Repair Placentia, CA
- – Rv Roof Leak Repair Placentia, CA
- – Rv Roof Repair Placentia, CA
- – Repair Rv Roof Leak Placentia, CA
- – Resealing Rv Roof Placentia, CA
- – Resealing Rv Roof Placentia, CA
- – Rv Fiberglass Roof Repair Placentia, CA
- – Resealing Rv Roof Placentia, CA
- – Rv Fiberglass Roof Repair Placentia, CA
- – Rv Roof Maintenance Placentia, CA
- – Epdm Rv Roof Repair Placentia, CA
- – OCRV Center
Rv Rubber Roof Repair Placentia, CA
I figured I would instead have it semi-portable so I opted for the canopy, plus this enables me to adjust the height backwards and forwards when I require to. Obviously the cheapest option of all would be to simply toss a good tarp over the top of your motor home for wet days and just work on sunny days! Initially I elevated the legs with 1 1/2 PVC pipeline that fit inside the legs and after that I connected a tube clamp around the PVC pipeline to stand up the cover legs.
This is still a little floppy. I most likely ought to have forked out for some inflexible steel pipe from the begin.
An old patch work on the Recreational vehicle rubber roof. As you can see, this roof has actually had a lot of concerns over the years.
On the base is the original EPDM rubber roofing system layer. I understand it's EPDM rubber and not TPO rubber due to the fact that of the black backing. On top of my EPDM roof covering is a thin Motor home roofing system covering that was used later on.
Rubber Roofing For Rv Placentia, CA
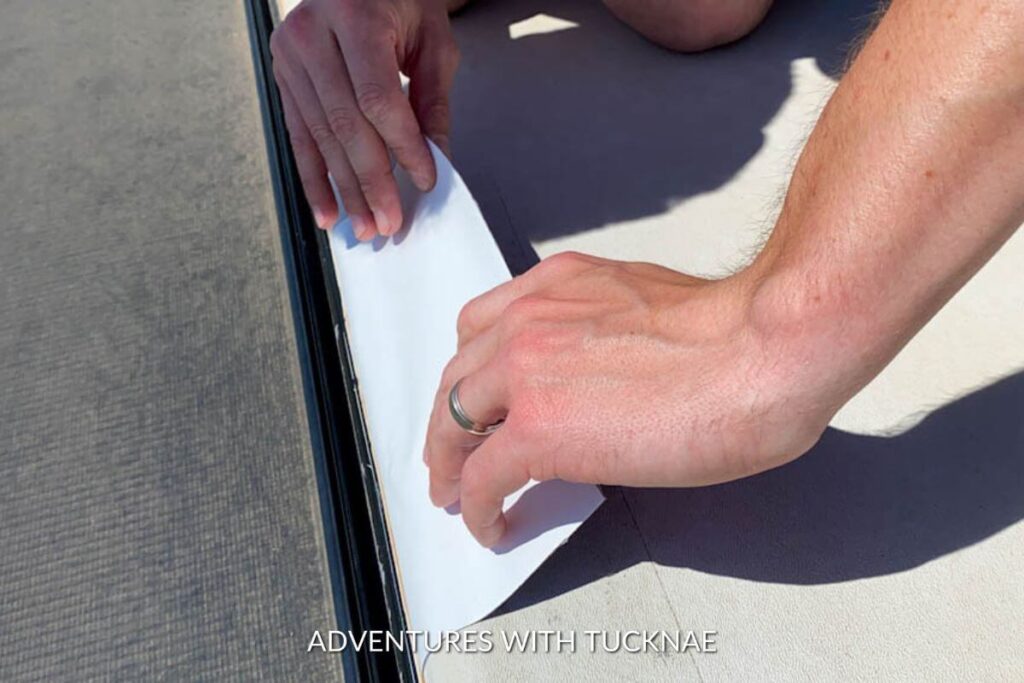
I simply left the roof covering covering stayed with the EPDM roof covering and pulled them up with each other. (You do not need to peel them up independently.) Beginning to peel roofing finish. Peeling off up area of the lower layer of rubber. This reveals that the original motor home roofing system was EPDM as a result of the black support.
I reduced lines with an utility knife around fixtures. All rubber roofing eliminated from camper. This step went pretty quickly. There was a glue under the lower layer of rubber that was still rather well stuck in several areas, but with a great little bit of force it peeled off up cleanly.
If you assume you'll be conserving the roof decking plywood (not changing it), then you may conserve on your own some cleaning difficulty by getting rid of the components first and after that peeling off up the rubber! More water harmed locations on Recreational vehicle roof outdoor decking.
Rv Roof Repair Placentia, CA
I went for the simplest one initially, an air vent cap from a cooking area sink pipes air vent pipe. Beginning to scrape caulk and sealant. I made use of a stiff scraper with a chisel-like blade and simply began spying and chipping and scraping and hacking. There is nothing else means around this, you just need to begin digging up until you subject the screw heads.

Loosening the screws in vent cap. The screws on this air vent cap were hex-head metal screws so I used a small socket vehicle driver to remove them.
I found an old wasp nest inside the air vent cover. This is a sight I'll most likely have actually to obtain used to, discovering the remains of animal habitation in every nook and cranny. I invest a terrible lot of my time producing good wildlife habitat in my yard so I don't obtain annoyed when a creature selects to set up home in my recreational vehicle.
Rv Roof Leak Repair Placentia, CA
The good news is nobody was home in this old nest so I simply threw it. Possibly I'll put a display over it when replacing it. Which brings us to the following point. You should attempt not to damage these pieces (like vent covers and caps) as you're removing the old caulk and sealer just in situation you need to use them again.
One down, 7 more fixtures to go. Following I made a decision to tackle the only roofing system ventilation follower that my camper has. My roof vent additionally had a vent cover over it. So I began scraping the gunk from those screws. Beginning on the roof covering vent. Hardware subjected on roofing vent cap, the very first nut came off clean.
The bolts on this Recreational vehicle roof covering air vent cover were nuts on small screws. The second one simply started rotating, meaning the bolt was not repaired in place but turning along with the nut. A peek at the hardware holding down the roof air vent cover.
Rv Roof Repair Placentia, CA
I didn't have any type of excellent way to hold the bolt in area so rather I decided to saw through the screws with a reciprocating saw. Sawing with screws on roof covering vent cover. I utilized a cordless reciprocating saw with a metal-cutting blade however it was challenging to obtain the blade level enough to reach the screws so near the roof covering deck.
Flexing the blade a little bit to get to near to the roof deck. Once I had sawn via the continuing to be 3 screws, I pried up the cover. The brackets that were holding the cover in location. Cover eliminated from roofing system vent. I unscrewed the braces from the flange of the air vent follower itself.
The majority of were so old and rusted that they sheared off when I unscrewed then with a great deal of force. Unscrewing the brackets that held the air vent cover in location. I scuffed much more caulk and roof sealant off the flange of the roof vent itself. I soon uncovered there disappeared screws or equipment stifling so I quit on the scuffing and went inside the RV After scuffing the caulk and sealant from flange of roofing air vent, say goodbye to screws! Loosening the within cover plate of roofing vent fan in RV bathroom.
Repair Rv Roof Leak Placentia, CA
I selected a drill little bit close to the dimension of the shaft of the screws that I had currently drawn out and began drilling. Choosing a drill little bit for drilling out a screw head.
Shatterproof glass suggested. I pierced out the heads, one stood out off and the various other I was getting irritated with and offered it a yank prior to it was drilled through. As opposed to standing out off the screw head, the plastic simply dissolved around the hot screw head. Whoops. Hope I do not have to recycle this cover.
Once the brackets were out I went back up leading to pry out the the roofing system vent. There are 2 wires running to the roofing system air vent (a black hot wire and a white neutral cord) that you'll require to clip to get rid of the old air vent (Rv Roof Repair Placentia).
Resealing Rv Roof Placentia, CA
These are the wires linking the roof airing vent fan. I clipped them just above heaven splice joints. Roofing air vent eliminated and tidied up. After clipping the wire and eliminating the vent, I tidied up any kind of continuing to be goop and obtained my initial good consider the roof covering frame. It's metal! 1 1/2 inches thick.
Some Recreational vehicle roofings are mounted with wood, others have steel framework. I scraped off some rust and made a huge mess inside the washroom.
My last goal of the day was to obtain the refrigerator vent cover off. I saw RV sealer blobs at four factors on the cover so assumed there have to be screws under them.
Subjecting the screws in the refrigerator vent cap. Peeling old recreational vehicle roof covering coating on top of refrigerator air vent cap I likewise noticed that there was a coat of motor home roofing system layer over the air vent cap. These coatings are repainted on with a brush so clearly whoever did this layer just blobbed know top of whatever.
Resealing Rv Roof Placentia, CA
Lifting off the cover of the refrigerator roof vent. When the cap is off it's more of the same. Cutting away much more rubber and removing recreational vehicle roof covering sealant and old caulk. Get comfy because this sucker has 32 screws in it! Ugh. Scuffing lap sealer and caulk from screw heads.
Prying off the fridge roof covering air vent after all screws are removed. Almost every screw was in good adequate condition to get rid of with an outlet motorist, yet a couple were as well corroded and required to be turned out with vice hold pliers.
Rv Fiberglass Roof Repair Placentia, CA
I peeled off the remaining rubber roof covering from under the flange and after that scratched off the old putty below. Scratching off the old putty from the flange of the fridge roof air vent.
That's as far as I obtained on day 1 after concerning 5 hours of lazy job. Over time, your RV's roofing can come to be used, harmed, or develop leakages, which can jeopardize its integrity and lead to more significant problems. If you're experiencing any of these problems, it might be time to think about changing your Motor home roof.
There are several indications that show your recreational vehicle needs a roof substitute. These indications include water leakages, sagging or soft areas on the roof, splits or splits in the roof covering product, excessive deterioration, and visible sunshine coming with the roof. If you discover any one of these indicators, it is important to resolve them immediately to stop more damage to your recreational vehicle.
Resealing Rv Roof Placentia, CA
On standard, Motor home roof replacement prices can vary from $2,000 to $10,000. When selecting a Recreational vehicle roofing system product, several variables come right into play.
Determining in between a do-it-yourself (DO IT YOURSELF) method or professional setup for your recreational vehicle roof replacement depends on your abilities, experience, and readily available time. While DIY installment can conserve you cash, it calls for ample understanding and proficiency to guarantee an appropriate and water tight installation. On the other hand, expert installment provides the benefit of competence, experience, and guarantees.
Inspect and cleanse the seamless gutters and downspouts to make sure appropriate drain and protect against water pooling on the roofing. Use a protective finish or sealer to the roof covering surface as advised by the manufacturer.
The cost of setting up a Recreational vehicle roof can vary based on factors like Motor home dimension, chosen roof material, and whether expert installment is asked for. If your RV's roof is damaged, put on out, or leaking, a roofing system replacement is usually necessary to ensure the structural honesty of your RV.
Rv Fiberglass Roof Repair Placentia, CA
Fixing a split in a Motor home roofing depends on the intensity and type of roofing product. For small holes, you can use roof covering repair service tape or sealant particularly created for Motor home roofing systems.
Investing in a high-quality recreational vehicle roof coating can be worth it for long-lasting roof covering upkeep. Flex Seal products are often used as short-term or quick-fix solutions for tiny leakages or fractures. While they may supply a short-lived option, it's recommended to talk to a professional and make use of proper recreational vehicle roofing system fixing products for a much more long-term and trustworthy fix.
Rv Roof Maintenance Placentia, CA
PVC roofing systems provide excellent sturdiness, resistance to UV rays, and reduced maintenance needs. They are taken into consideration a reputable choice for Motor home roofs, but the ideal choice depends on your details requirements and preferences.
Resealing your RV roof covering need to be done routinely to keep its honesty and avoid leakages. As a general standard, it's recommended to reseal your RV roofing a minimum of annually or as per the maker's suggestions. Whether to leave your recreational vehicle slides in or out depends on the scenario and individual preference.
Consider aspects such as security, climate condition, and comfort when making the choice. Motor home roofing system leakages are fairly usual because of different variables such as age, deterioration, incorrect maintenance, or extreme weather conditions. Normal inspections and aggressive maintenance can assist lessen the incident of leaks. The choice to amount to a recreational vehicle as a result of water damage depends on the degree of the damage and the insurer's evaluation.
Epdm Rv Roof Repair Placentia, CA
Insurance protection for RV delamination depends upon the particular plan and the reason for delamination. It is essential to examine your insurance plan and consult with your carrier to understand the insurance coverage for delamination and any suitable deductibles. Declaring water damage on a camper depends on your insurance coverage plan and the conditions bordering the water damage.
Repair Rv Roof Placentia, CARv Roof Replacement Placentia, CA
Rv Rubber Roof Replacement Cost Placentia, CA
Rv Roof Repair Placentia, CA
Roof Repair For Rv Placentia, CA
Rv Roof Repair Near Me Placentia, CA
Rv Roof Leak Repair Placentia, CA
Rubber Roof For Rv Placentia, CA
Class C Rv Roof Repair Placentia, CA
Repair Rv Roof Leak Placentia, CA
Replace Rv Roof Placentia, CA
Rv Trailer Rubber Roof Repair Placentia, CA
Best Rv Roof Repair Placentia, CA
Rv Rubber Roof Maintenance Placentia, CA
Rv Rubber Roof Replacement Cost Placentia, CA
Rubber Roof For Rv Placentia, CA
Rv Roof Leak Repair Placentia, CA
Rv Roof Repair Placentia, CA
Rubber Roof For Camper Placentia, CA
Rv Trailer Roof Repair Placentia, CA
Rv Rubber Roof Repair Placentia, CA
Replace Rv Roof Placentia, CA
Rv Rubber Roof Maintenance Placentia, CA
Rv Slide Out Roof Repair Placentia, CA
Rubber Roofing For Rv Placentia, CA
Rv Trailer Roof Repair Placentia, CA
Repair Rv Roof Placentia, CA
Rv Rubber Roof Maintenance Placentia, CA
Motorhome Roof Replacement Placentia, CA
Rv Rubber Roof Replacement Placentia, CA
Rv Rubber Roof Replacement Cost Placentia, CA
Rv Roof Repair Placentia, CA
Rv Roof Repair Near Me Placentia, CA
Rv Fiberglass Roof Repair Placentia, CA
Rv Roof Leak Repair Placentia, CA
Rubber Roof For Camper Placentia, CA
Rv Roof Repair Near Me Placentia, CA
Rv Roof Replacement Placentia, CA
Epdm Rv Roof Repair Placentia, CA
Rv Rubber Roof Repair Placentia, CA
Repair Rv Roof Leak Placentia, CA
Class C Rv Roof Repair Placentia, CA
Repair Rv Roof Placentia, CA
Rubber Roofing For Campers Placentia, CA
Rv Rubber Roof Maintenance Placentia, CA
Rubber Roof Installation Placentia, CA
Rubber Roofing For Campers Placentia, CA
Motorhome Roof Replacement Placentia, CA
Rv Roof Repair Near Me Placentia, CA
Rubber Roof For Camper Placentia, CA
Roof Repair For Rv Placentia, CA
Rv Rubber Roof Maintenance Placentia, CA
Rv Rubber Roof Replacement Placentia, CA
Rv Slide Out Roof Repair Placentia, CA
Rv Rubber Roof Repair Placentia, CA
Rubber Roof For Rv Placentia, CA
Motorhome Roof Replacement Placentia, CA
Rubber Roofing For Campers Placentia, CA
Rv Trailer Roof Repair Placentia, CA
Repair Rv Roof Placentia, CA
Rv Trailer Roof Repair Placentia, CA
Replace Rv Roof Placentia, CA
Rv Roof Repair Service Near Me Placentia, CA
Rv Rubber Roof Maintenance Placentia, CA
Motorhome Roof Replacement Placentia, CA
Motorhome Roof Replacement Placentia, CA
Repair Rv Roof Placentia, CA
Resealing Rv Roof Placentia, CA
Rv Rubber Roof Replacement Placentia, CA
Rubber Roofing For Campers Placentia, CA
Rv Roof Repair Near Me Placentia, CA
Rv Rubber Roof Replacement Cost Placentia, CA
Roof Repair For Rv Placentia, CA
Repair Rv Roof Placentia, CA
Rv Roof Maintenance Placentia, CA
Rv Rubber Roof Replacement Placentia, CA
Class C Rv Roof Repair Placentia, CA
Best Rv Roof Repair Placentia, CA
Around Me Seo Services For Small Business Placentia, CA
Companies Near Me Seo Pricing Placentia, CA
OCRV Center
Table of Contents
- – Rv Rubber Roof Repair Placentia, CA
- – OCRV Center
- – Rubber Roofing For Rv Placentia, CA
- – Rv Roof Repair Placentia, CA
- – Rv Roof Leak Repair Placentia, CA
- – Rv Roof Repair Placentia, CA
- – Repair Rv Roof Leak Placentia, CA
- – Resealing Rv Roof Placentia, CA
- – Resealing Rv Roof Placentia, CA
- – Rv Fiberglass Roof Repair Placentia, CA
- – Resealing Rv Roof Placentia, CA
- – Rv Fiberglass Roof Repair Placentia, CA
- – Rv Roof Maintenance Placentia, CA
- – Epdm Rv Roof Repair Placentia, CA
- – OCRV Center
Latest Posts
Rv Trailer Rubber Roof Repair West Covina
Awning Installation Norco
Rv Awning Repair Placentia
More
Latest Posts
Rv Trailer Rubber Roof Repair West Covina
Awning Installation Norco
Rv Awning Repair Placentia